
Series – Windows 10 Customization
In this post I will show you how to export & apply default application associations using Windows 10 LTSC & Group Policy. Applying a default application associations file can be useful as it will apply the application defaults on your users’ workstations, helping to standardize your environment.
Apply the default app associations on your reference workstation –
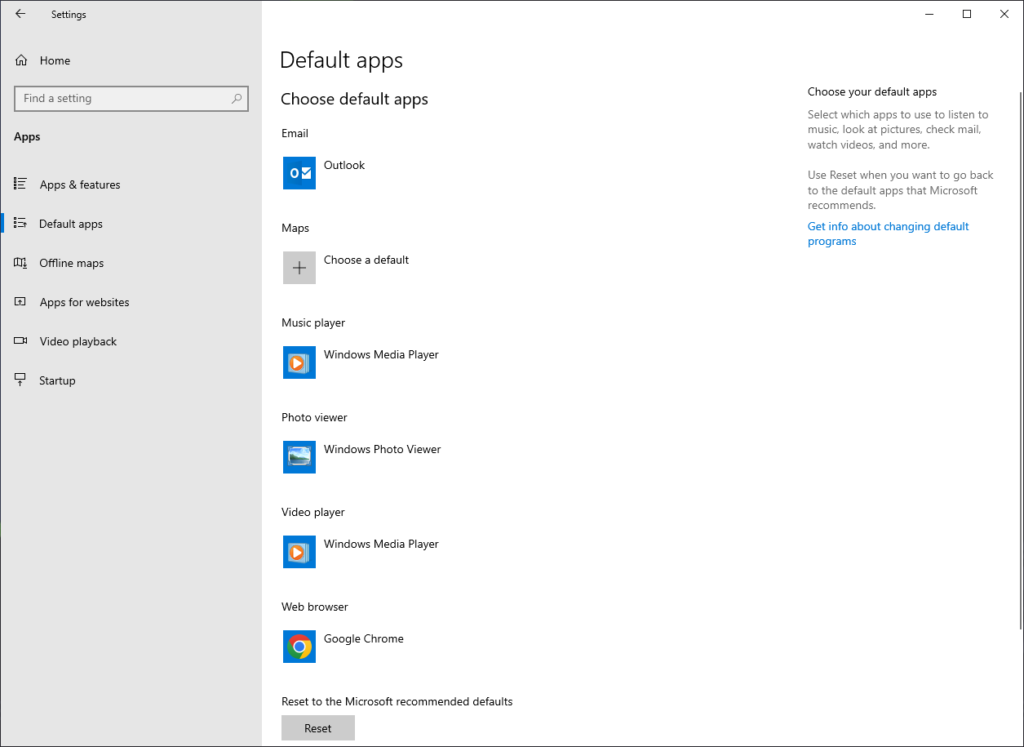
Navigate to Start Menu > Settings > Apps > Default apps & choose the default apps for your environment as I have done below.

Export the default apps using CMD –
I followed this Microsoft doc which explains the commands required to export the XML file. In short I ran the command below, exporting the XML to a folder named ‘1’ in the C:\ drive.
Dism /Online /Export-DefaultAppAssociations:"C:\1\DefaultApps.xml"After you have exported your XML you can now copy it to a location in your environment where your workstations can read from. I recommend a Share on a Member Server.
Create a Folder on the local device using Group Policy –
1. Open Group Policy Management Console.
2. Create a new Group Policy Object or edit an existing policy.
3. Edit the Policy & navigate to Computer Configuration >Preferences > Windows Settings > Folders.
4. Here you can right click and choose New > Folder.
5. I usually leave the Action as Update. Add the Path, such as ‘C:\Program Files\LocalFiles’. Variables can be used too.
6. You can change the Attributes so that the folder is Hidden.

These are the only settings I normally change. This will create a folder on the device when it is powered on and when a GPupdate has been processed.
Copy the XML file from network share to the local folder location on the device –
1. Within Group Policy, navigate to Computer Configuration > Preferences > Windows Settings > Files.
2. Here you can right click and choose New > File.
3. I usually leave the Action as Update. You need to select the Source file, this is the XML file which is stored on your network location.
4. Add a Destination File, this is the location where the XML file will be stored on your local device (Use the Folder location created earlier).

This will copy the file to the local folder location on the device.
Configure a Group Policy to apply the Default Application Associations file to your users –
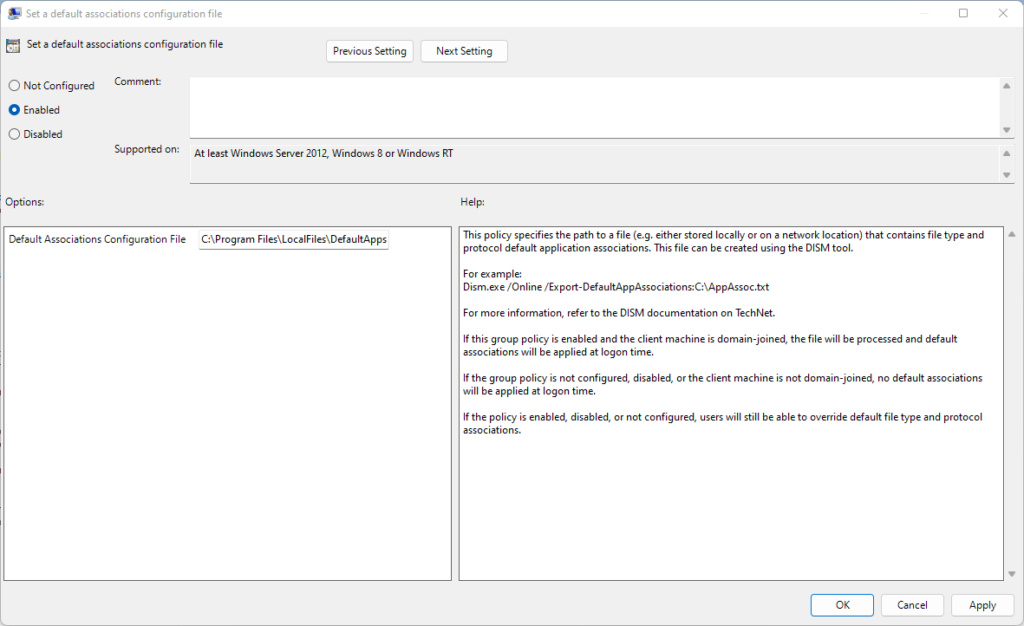
1. Open Group Policy and navigate to Computer Configuration > Policies > Administrative Templates > Windows Components > File Explorer
2. Modify the policy setting called Set a default associations configuration file.
3. Enable the policy & add the local file path for your environment. In this case I used C:\Program Files\LocalFiles\DefaultApps.xml.

Once your devices have completed a full gpupdate this will apply the default app associations to your workstations, as per the XML file which you have exported from your reference machine.
It is worth noting that the Source File path that I used above is not the best place to store your resources. Ideally you should store resources within a Share on a Member Server which your workstations can read from.

